Item
At this Item menu, you can equip or manage items. Currently the following menus are available:
-
Equip Item
-
Manage Item
You can manage the game item equipped such as changing the configuration for the items. Or you can create your own custom item.
Equip Item
This menu is used to equip the mudfish game/site items.
Manage Item
Item Configuration
Usually, you can visit the item configuration menu by clicking "Item -> Manage Item" menu or clicking the item link in the 'My Items' on the dashboard. The following options can be found in the item configuration menu.
-
Auto Refresh
Save your time and steps. The item would be auto-refreshed when the remain days become less than 3 days.
-
Server Location
List of destination locations supported by this item. To get best RTT or node information, please specify a destination location you're playing.
-
Today's recommended pathes
It calculates with the RTT information collected based on the "Server Location" above and provides information on optimal mudfish node pathes. You can check estimated RTT mean and deviation information.
-
Nodes
You can pick the mudfish node you'd like to use. Currently the following node modes are supported.
-
Basic mode
-
Advanced mode
-
Multi Path mode
-
-
Active
Select whether it's active or not affecting to set the routing table entries.
Create Custom Item
Sometimes you'd like to use Mudfish for games which officially unsupported by Mudfish. Without using Full VPN mode , you can play the game with creating your own item. The following is a step by step instruction.
Please keep "Auto Refresh" option turn on if you don't want to delete your custom item. Default valid days of the custom item is 30 days. If 'Auto Refresh' option is off, it'll be deleted after 30 days.
To generate the custom item, you can use the following methods:
-
Create
-
Import
Prerequisites
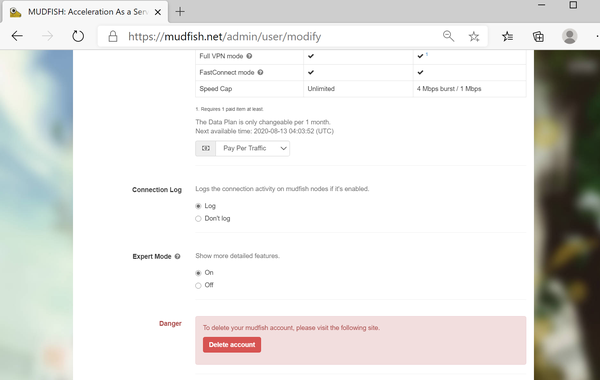
Turns on Expert Mode with visiting 'Setup → Account' menu.
Please make sure you log out and log in again to apply the change of Expert Mode.
Create
-
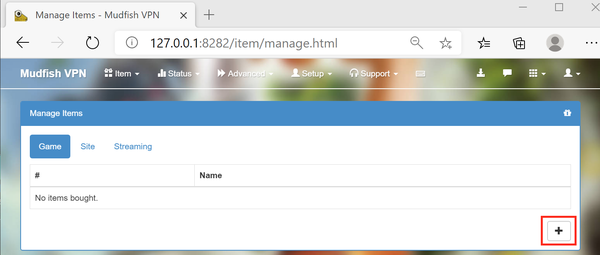
Moves to 'Item → Manage Items' menu. At there, you can see button. It shows 'Item Add' menu
-
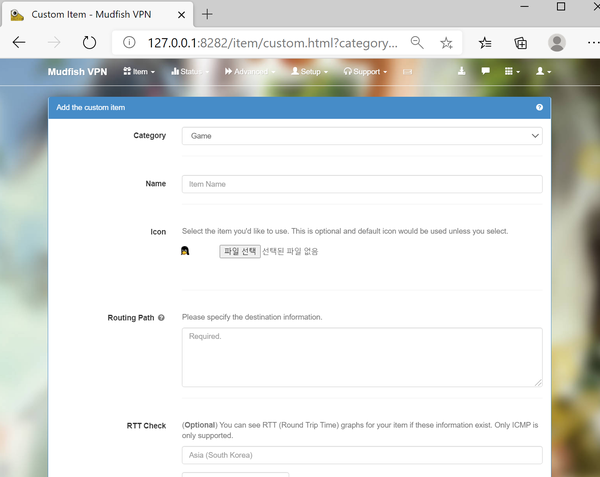
Please see the title and description for details. Please check the help text on the page.
-
Please fill the routing table. Currently Mudfish supports three types of destination information:
-
If you know the destination's IP, you can put it based on CIDR syntax. For example:
- 1.1.1.0/24
-
Hostname
For example, you can put "www.google.com" or "www.mudfish.net" domains as the destination information. Then mudfish core programs try to resolve it to IP address and register it based on CIDR /24
-
Process Name
tipThis feature is supported on Windows and Linux only.
From Windows, Windows 8+ and mudfish v4.5.1+ Mudfish package is shipping MUDWFP (Mudfish Windows Filtering Platform) driver with the installer. Please note that MUDWFP doesn't support Windows 7.
For Linux, eBPF based WFP mode is supported in Mudfish v6.2.0 or higher.
warningPlease use the process name. No executable path is supported.
You can redirect the traffics based on per-process basis. For example:
P:firefox.exe
This syntax tries to redirect the traffics from firefox.exe processes. If you want to add multiple process names, it's possible too. You can add multiple
P:lines. For example,P:chrome.exeP:firefox.exeP:whale.exe
Per-process options
warningIf you want to use per-process options, you must use Mudfish v5.8.1 or above version.
Mudfish supports per-process options and supports the following rules:
-
E<port_number>Exclude the specific
<port_number>. This applies to both TCP/UDP. You can define multipleE<port_number>syntaxes to exclude multiple ports. -
I<port_number>Include the specific
<port_number>. This applied to both TCP / UDP. You can define multipleI<port_number>syntaxes to include multiple ports. -
N<cidr>warningTo use this option, at least Mudfish Cloud VPN v5.16.0 or above is required.
Include the specific
<cidr>IP block based on CIDR syntax. If you want to apply the rule to specific IP block, you can use this syntax. For example, the follow syntax is valid:-
N1.1.1.1/32 -
N85.33.9.0/24
-
-
RCauses operation in Reverse mode. You can only define once.
-
X<cidr>warningTo use this option, at least Mudfish Cloud VPN v5.16.0 or above is required.
Exclude the specific
<cidr>IP block. If you want to apply the rule to specific IP block, you can use this syntax. For example, the follow syntax is valid:-
X1.1.1.1/32 -
X85.33.9.0/24
-
Each option must be separated by a semicolon (
;). See the example usage below:infoIs your per-process option too long? Or over 64 characters? For example, you can use the following syntax to split the option into multiple lines:
P:eFootball.exe;N34.120.0.0/16P:eFootball.exe;N34.140.0.0/16P:eFootball.exe;N34.249.0.0/16
-
P:curl.exe;E443;E80Sets the
curl.exeprocess to be forwarded through the Mudfish node, but configures Port 443 and Port 80 to connect directly from the user's computer without going through the mudfish node. -
P:chrome.exe;E80;X1.1.1.1/32Sets the
chrome.exeprocess to be forwarded through the Mudfish node, but configures Port 80 and 1.1.1.1/32 IP block to connect directly from the user's computer without going through the mudfish node. -
P:proc.exe;R;I80Handles traffic generated by the
proc.exeprocess, but because it is inRmode, all connections are connecting directly from the user's computer. However, traffic on Port 80 is forwarded through the mudfish node. -
P:chrome.exe;R;I80;N1.1.1.1/32Sets the
chrome.exeprocess to be forwarded through the Mudfish node, but only handles Port 80 or 1.1.1.1/32 IP block by Mudfish nodes. For other destination or ports, it'll be directly connected from your desktop.
-
-
"RTT Check" is a optional but if you'd like to see RTT information between your desktop and game servers via Mudfish nodes please add a destination. Currently, the following protocols are supported:
-
ICMP Protocol
To successfully test this destination, you must enter an IPv4 address where ping is working. Please provide an IP address that can respond to ICMP echo reply.
-
TCP Protocol
Enter the IP address and port information capable of performing a TCP three-way handshake.
By clicking the "Test" button, you can immediately verify whether the ping to the destination is functioning correctly or check the current RTT value.
When you input destination information, you can see the following details:
-
Recommended route information for today.
-
Optimal ping value calculation and route search, etc.
-
To check the mentioned information, it takes at least 1 to 2 hours for the RTT data to accumulate after configuring the destination. After entering the information, please wait patiently as the data gradually builds up, allowing you to utilize this information effectively.
- When you create your item, you should restart Mudfish at least once.
Import
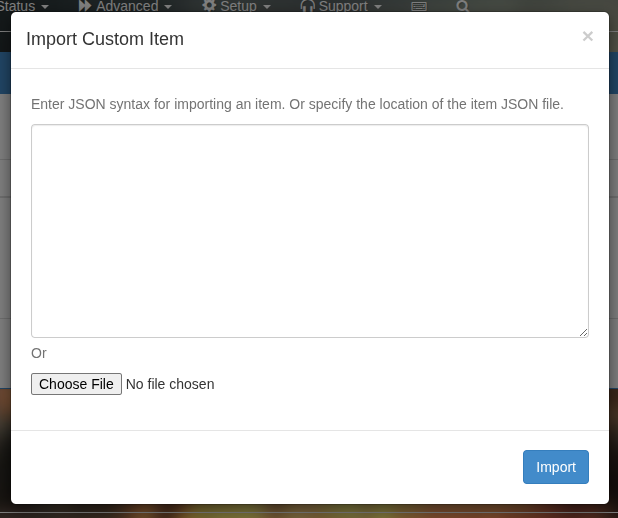
If you already have an item configuration file or a text, you can import it to create a new item at "Item -> Manage Items" menu.
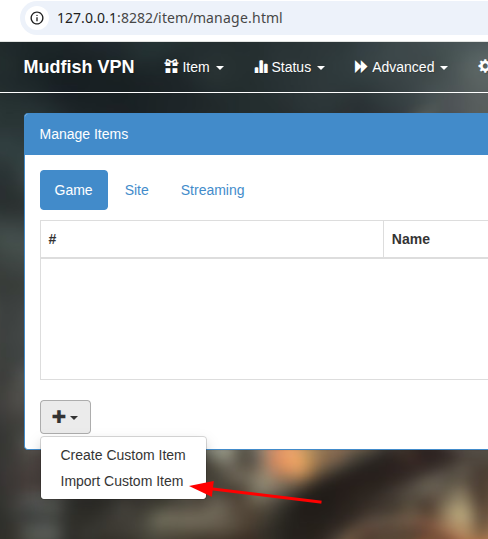
You can copy and paste the item configuration text or upload the item configuration file.
Item Configuration Example
This is an example of item configuration file. This is to create an item for "Lineage W" with the following configuration:
- Process name:
lineager.exe - IP address:
13.125.130.0/24,18.162.166.0/24,52.74.54.0/24 - Protocol: ICMP
- Location: Asia (South Korea), Asia (Hong Kong), Asia (Singapore)
{
  "item": {
    "category": "game",
    "icon": "",
    "name": "Lineage W",
    "rt": [
      {
        "procname": "lineager.exe"
      },
      {
        "ip": "13.125.130.0",
        "netmask": "255.255.255.0"
      },
      {
        "ip": "18.162.166.0",
        "netmask": "255.255.255.0"
      },
      {
        "ip": "52.74.54.0",
        "netmask": "255.255.255.0"
      }
    ],
    "rtt": [
      {
        "family": "AF_INET",
        "ip": "13.125.130.57",
        "is_private": 0,
        "location": "Asia (South Korea)",
        "protocol": "ICMP"
      },
      {
        "family": "AF_INET",
        "ip": "18.162.166.190",
        "is_private": 0,
        "location": "Asia (Hong Kong)",
        "protocol": "ICMP"
      },
      {
        "family": "AF_INET",
        "ip": "52.74.54.28",
        "is_private": 0,
        "location": "Asia (Singapore)",
        "protocol": "ICMP"
      }
    ]
  }
}
FAQ (Frequently Asked Questions)
MUDEC_01437 is shown when creating an item.
If you see this error, it means that 'Server Location' option is not set.